

How to Fix User Profile Cannot Load in Windows?
Question
Problem: How to Fix User Profile Cannot Load in Windows ?
Hello. I tried to log in to my Windows PC and suddenly I got the error “User profile cannot load”. Why does this happen? Is there a way to fix it?

How to Fix User Profile Cannot Load in Windows?
“User profile cannot load” is a common error message that Windows users may encounter when they try to log in. This error prevents the user from accessing their profile, thus preventing them from accessing their files and settings. The error message can appear because of a myriad of reasons, such as corrupted user data, problems with the user’s account settings, or problems with system files.
This issue can have a significant impact on users because it can cause data loss and restrict access to critical files and applications. It can also cause frustration and inconvenience, particularly for those users who rely on their computers for work or play.
Restarting the computer, creating a new profile, checking the system for errors, using System Restore, or modifying the user’s account settings are all viable options for resolving the “User profile cannot load” error. The best solution can be determined by the cause of the error and the technical knowledge of the users. To avoid data loss, it’s always a good idea to back up any important data before attempting to fix the problem.
In this guide, you’ll find 6 steps that should help you fix “User profile can’t load” in Windows. Keep in mind that the manual solution process can be slow. You can try using a maintenance tool like Fortect that can fix most system errors, blue screens, corrupted files, registry issues, or clear cookies and cache. Otherwise, follow the step-by-step instructions below.
Method 1. Try Safe Mode
Go to the Windows sign-in page.
- Locate the power button in the bottom right corner of the screen.
- Hold down the Shift key and click on the Restart option from the drop-down menu.
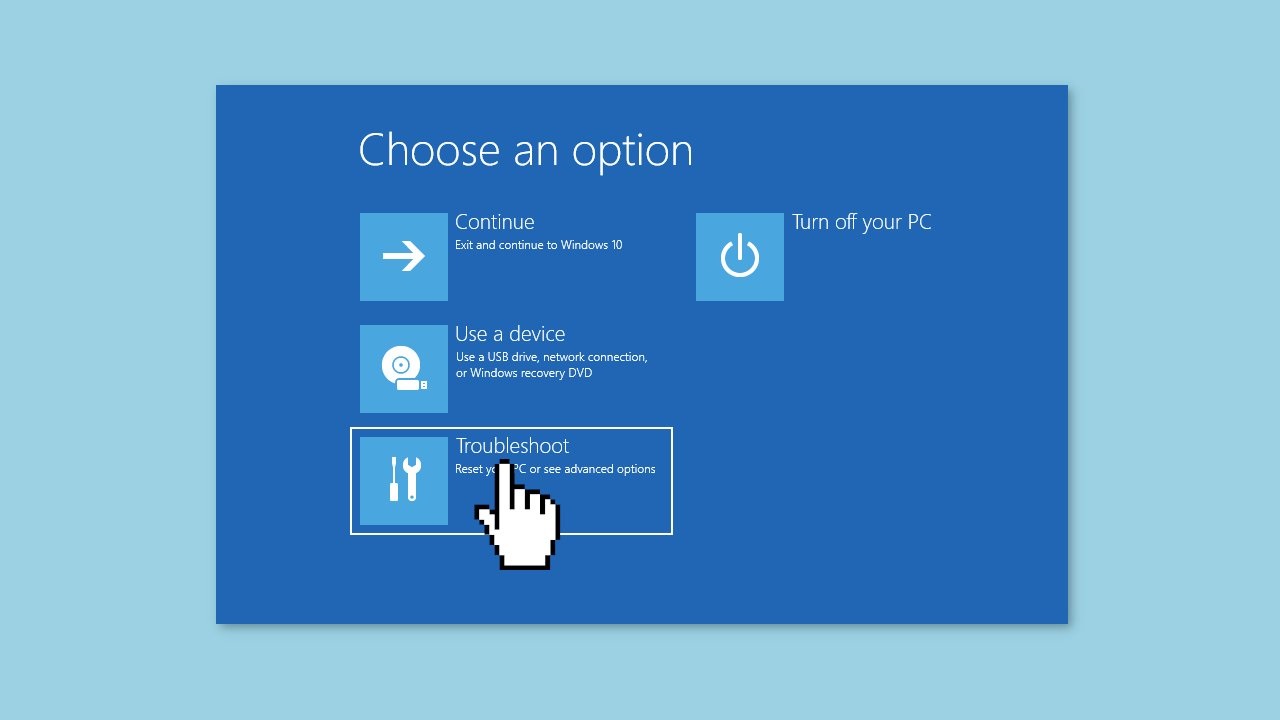
- Wait for your computer to restart and the Choose an option page appears.
- Click on Troubleshooter on the Choose an option page.
- Select Advanced Options from the Troubleshoot menu.
- Tap on Startup Settings from the Advanced Options menu.
- Click Restart in the Startup Settings menu.
- When your computer restarts, you’ll see a list of all your boot options. Press 5 or F5 to start your computer in Safe Mode.
Method 2. Create a new local user account
- Start your Windows computer in Safe Mode.
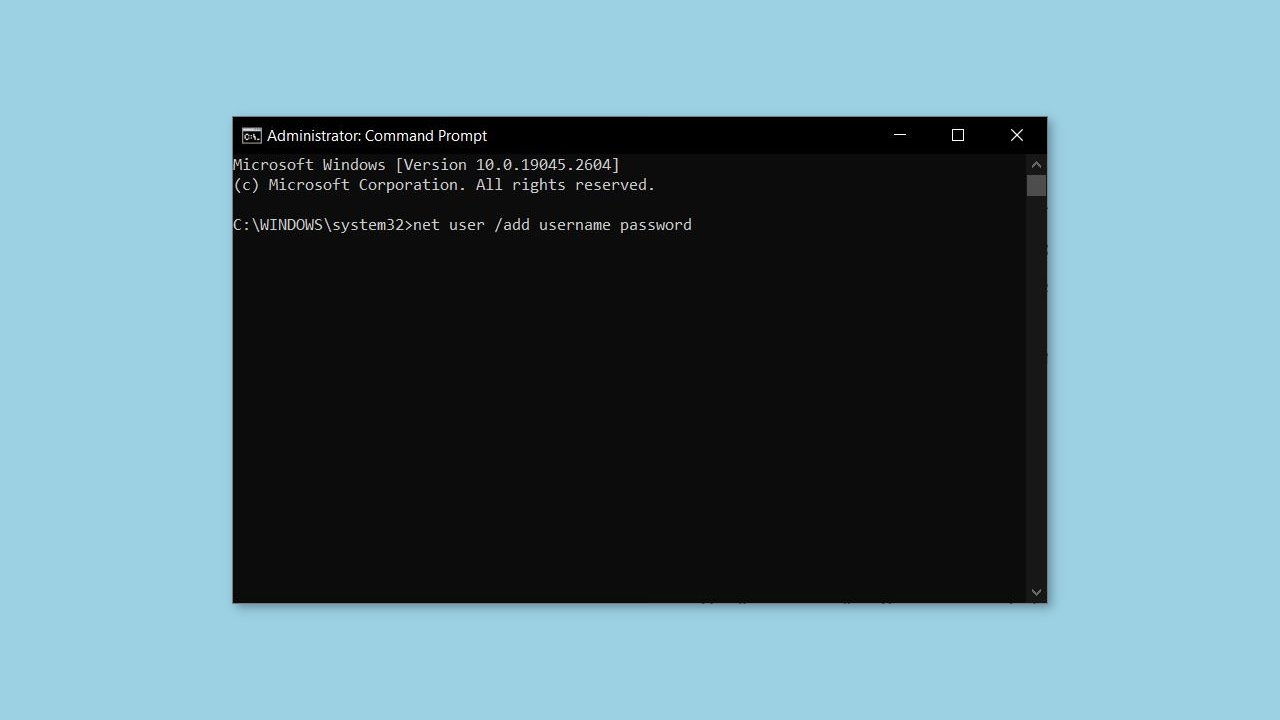
- Search for the Command Prompt in the Windws search box and open it.
- Type the command net user /add username password into the Command Prompt window and press Enter.
- Replace the username with the name you want to use for the new user profile. If you want to set up a password for your profile, create one. If not, leave the password field blank.
- Type the command localgroup administrators username /add in the Command Prompt window and press Enter.
- Replace the username with the name of the profile you created in the previous step.
- Close the Command Prompt window.
- Log out of Safe Mode and log in with your new profile you just created.
- Go to the folder that contains the data you want to copy from an inaccessible profile.
- Copy the data to a secure location.
- Log out of the new user profile and log back into your normal user profile.
- Copy the data from the secure location to your normal profile.
Method 3. Restart the User Profile Service
- Press the Windows + R keys on your keyboard.
- Type services.msc in the Run box that appears.
- Press Enter or click OK to open the Services window.
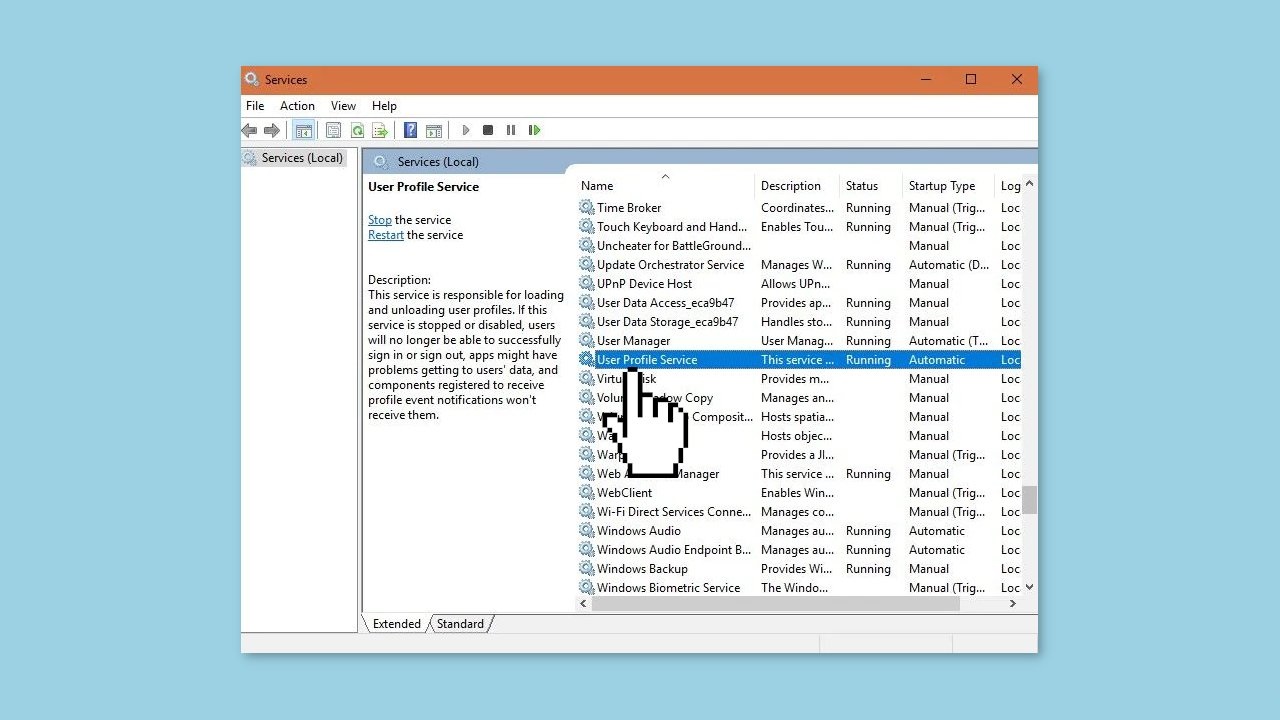
- Scroll down and locate User Profile Service in the list of services.
- Right-click on User Profile Service.
- Select Restart from the drop-down menu that appears.
- Wait until the service restarts. You should see a message indicating the service you’ve restarted.
- Right-click again on User Profile Service.
- Click on Properties from the drop-down menu.
- In the Properties window, locate the Startup Type option.
- Make sure the Startup Type is set to Automatic.
- Click OK to save your changes.
Method 4. Select Normal Boot
- Start your Windows computer in Safe Mode using the steps outlined in Method 1.
- Press the Windows + R keys on your keyboard to open the Run box.
- Type msconfig and press Enter to open the System Configuration window.
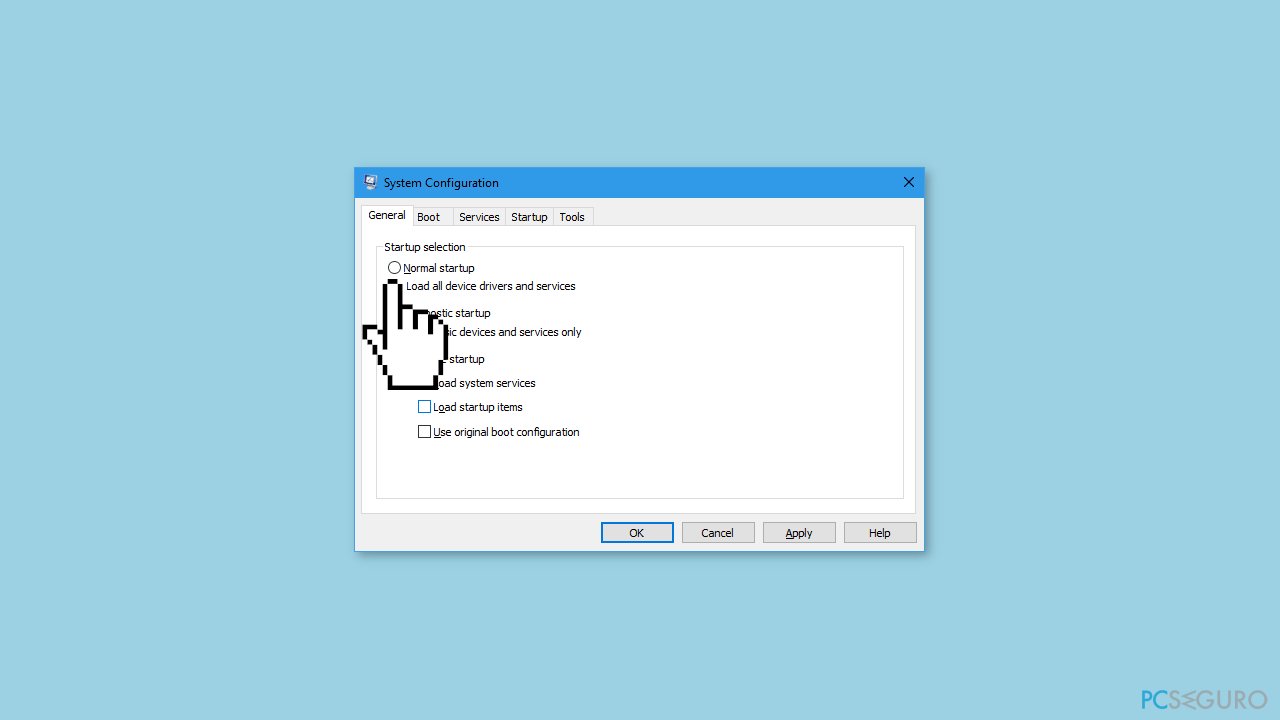
- In the System Configuration window, click on the General tab.
- Click on Normal Boot under Boot selection.
- Click Apply and OK.
- Switch to the Services tab.
- Select Enable all at the bottom of the window.
- Click Apply and OK.
- Restart your PC.
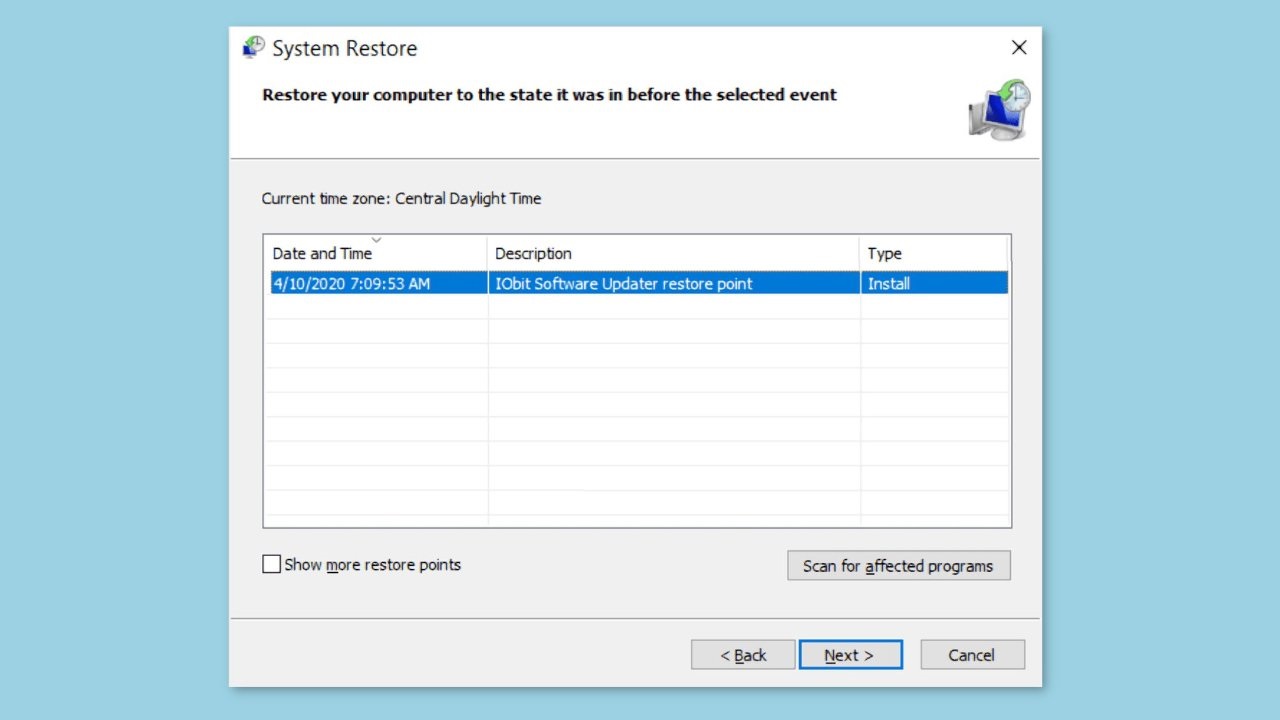
Method 5. Use System Restore
- Click the Power icon in the bottom right corner of the Windows login page.
- Hold down the Shift key and click Restart.
- On the Choose an option page, click Troubleshoot.
- Click on Advanced Options.
- On the next page, click System Restore.
- Click Next.
- Select the Restore Point you want to use.
- Click Next.
- Click Finish to start the restore process.
- Wait until the process is complete.
- Once the process is complete, the user profile issue should be fixed.
Method 6. Replace NTUSER.dat file
- Boot your Windows computer into Safe Mode using the steps outlined in Method 1.
- Press the Windows + E keys on your keyboard to open File Explorer.
- Navigate to the hard drive where Windows is installed and open it (usually C:).
- Click on the Users folder.
- Click View at the top of the File Explorer window.
- Check the box for Hide items to show hidden items in the folder.
- Click on the Default folder.
- Right-click on the NTUSER file. DAT and select Rename.
- Change the name to NTUSER. .DAT. OLD.
- Go back to the Users folder.
- Open another user profile.
- Copy the NTUSER file. DAT from that user profile.
- Paste the NTUSER file. DAT in the Default folder where you renamed the file to NTUSER. .DAT. OLD.
- Restart your computer.
- Check to see if the issue with your user profile has been resolved.
Repair Your Mistakes Automatically
The pcseguro.es team is trying to do everything they can to help users find the best solutions to eliminate their errors. If you don’t want to mess around with manual repair techniques, please use the automatic programs. All recommended products have been tested and approved by our professionals. The tools you can use to fix your error are listed below.
Read More: 5 best tricks to boost-up your home Wifi – EPN
What types of games do you offer for download?
We offer a wide variety of games catering to different preferences and platforms. You can find everything from action-packed shooters and immersive RPGs to casual puzzles and indie gems. Our library includes games for PCs, consoles, and mobile devices.
Are the downloads free, or do I have to pay?
We offer free games. Some titles are available for free download.
Is it safe to download games from your website?
Yes, absolutely. We prioritize the safety and security of our users. All games available for download on our website undergo thorough screening for malware and viruses. Additionally, we partner with trusted developers and publishers to ensure that our users have a safe gaming experience.
How do I download games from your website?
Downloading games from our website is simple. Just browse through our library, select the game you want, and click on the download button. Follow the on-screen instructions to complete the download process. Depending on the size of the game and your internet speed, it may take some time to download.
Are there any age restrictions for downloading games?
Yes, some games may have age restrictions due to their content. We adhere to age ratings provided by official rating boards such as the ESRB, PEGI, and others. Make sure to check the age rating of each game before downloading to ensure it's suitable for your age group.
Can I share downloaded games with friends or family?
Sharing downloaded games with others may violate copyright laws and licensing agreements. We encourage our users to respect intellectual property rights and refrain from unauthorized distribution of downloaded games. If your friends or family members are interested in a particular game, encourage them to download it legally from our website.